Blog
Elle Indonesia Behind The Scenes Look At The Editorial In The Making
 Posted on September 8, 2016
 by admin
  0
0
I had fun working on this series. Working with Lindsay is always awsome she gives me complete freedom.
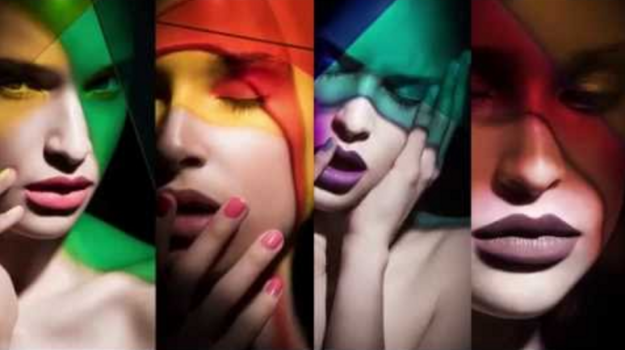
Lindsay A. “I’ve been wanting to shoot an editorial with gels projected on the face for quite some time now! I teamed up with the incredibly talented Griselle Rosario to do hair and makeup for this Elle Indonesia editorial.
For this shoot we bought Rosco gels and misc transparent plastics to hold between the subject and the light to cast the rich colors on the face. We actually used the gels as part of the composition in the frame to create lines upon lines to enhance the interest and composition. I used a single strobe with high contrast modifier (zoom reflector) and or grid to cast the color onto the face.
I had so much fun layering colors, lines and shooting with the Canon 5Ds for intense detail in these macro beauty shots.
On this bold and dramatic gel shoot stylist LSC for 4Seasons Style Management provided accessories and Angel Williams was our manicurist. I photographed beautiful Cece from Wilhelmina as my gel muse!
View the finished images here: http://learn.lindsayadlerphotography….
By the middle of the first decade of this century the digital revolution had transformed photography so completely that that the ranks of film cameras in production were decimated. While digital is destined to
remain the primary capture medium, shooting film is enjoying a renaissance, especially among artists and traditionalists, and film in the popular 35mm, 120, and sheet film sizes is still widely available.
Indeed, you can no longer buy, say, a Hasselblad 500C with 80mm f/2.8 Zeiss Planar lens on eBay for $400, as you could in 2007 or 2008 when everyone was dumping their film cameras—a clean one will now set you back over a grand.
If you’re hankering for a brand new film camera the good news is that there are a surprising number of excellent choices still out there which we’ve detailed below.
Some are fairly pricey, so you may also want to check out B&H’s Used Department’s listings when pursuing the film camera of your dreams.
If you’re aiming to jump into analog with both feet, you can also find a wide range of darkroom equipment, chemicals, and photographic paper on the B&H website.
Now it’s back to the future with a camera selection that will warm a film fanatic’s heart.
A Trio of Classic Leica M’s
It’s fitting that Leica, the company that put the 35mm rangefinder on the map, still offers three M-series models, all incorporating the magnificent Leica range/viewfinder with parallax-compensating,
auto-indexing frame lines that debuted on the Leica M3 in 1954. Leica M-A (Typ 127): With an appearance recalling a timeless classic, this camera is a totally manual, mechanical camera requiring no battery.
Its traditional, horizontal rubberized cloth focal-plane shutter provides speeds of 1-1/1000 sec plus B, and its gorgeous bright line range/viewfinder has parallax-compensating, selectable,
auto-indexing frame lines for lenses ranging from 16mm to 135mm.
It incorporates Leica’s signature silky smooth single-stoke manual film-wind lever, an “old fashioned” rewind knob, and Leica’s traditional removable bottom cover for loading.
Leica MP: An updated homage to the original MP created for photojournalists, this robust, manual classic requires a battery only to power its through-the-lens selective, center-weighted metering system.
This all-metal rangefinder provides shutter speeds from 1-1/1000 sec plus B, X sync up to 1/50 sec, and has the same 0.72x-magnification viewfinder as the M-A, with projected, parallax-compensating,
auto-indexing frame lines for 28, 35, 50, 75, 90, and 135mm lenses.
Leica M7: A proven model in production for decades, it delivers the essential Leica M experience while providing the advantages of aperture-priority
auto-exposure via a horizontal cloth focal-plane shutter with electronically timed speeds of 4-1/1000 sec plus all-mechanical shutter speeds of 1/60 and 1/125 sec should you run out of juice.
All the other classic M-series features are present, including the 6-frame 0.72x range/viewfinder detailed above, plus the ability to shoot at flash speeds of up to 1/1000 sec with dedicated Metz flash units,
and exposure setting info in the viewfinder. The M7 embodies the classic Leica M form and function while offering many modern conveniences that enhance its speed and convenience.
A brace of iconic Nikon SLRs
Nikon F6: You’ve got to hand it to Nikon for still offering this flagship 35mm SLR with an advanced Multi-CAM 2000 AF Sensor Module that controls an 11-zone AF system with 9 cross-type sensors,
1005-zone 3D Matrix Metering with spot, evaluative, and flexible center-weighted options, an ultra-reliable Kevlar and aluminum-bladed shutter with electronically controlled speeds up to 1/8000 sec,
and a maximum film advance rate of 5.5 fps (8 fps with optional MB-40 Battery Pack).
Functions are displayed on two LCDs: one on top and one on the back. Additionally, the F6 offers i-TTL balanced fill flash with compatible flash units,
41 custom settings, a mirror lockup, and multi-exposure capability, all in a rugged, stylish package.
Nikon FM10: Emerging film fans and photography students will be delighted with this all-manual 35mm SLR with all-mechanical shutter speeds of 1-1/2000 sec plus B, and flash sync at 1/125 sec that operates without battery power.
Only the simple match-diode center-weighted meter requires long-lasting button batteries, and the camera accepts all F-mount lenses that have aperture rings.
Other features: fixed, split-image focusing screen with micro-prism and a mechanical self-timer that can be used to lock up the mirror.
A classic roll film rangefinder folder from Fuji
Fujifilm GF670: The sole survivor of a once flourishing breed, this cool, contemporary folding camera shoots 6×6 or 6x7cm images, accepts 120 or 220 roll film,
has a coupled, combined, superimposed-image range/viewfinder with projected, parallax-compensating frame lines, a center-weighted aperture-priority auto-exposure system,
full manual settings, and an electronically controlled leaf shutter with speeds ranging from 4-1/500 sec that will syncs with flash at all speeds. Its high-performance,
80mm f/3.5 EBC Fujinon lens provides 40mm equivalent coverage when using the 6x7cm format and 44mm equivalent on 6x6cm.
The GF670 is an excellent all-around field, street, and travel camera that combines classic virtues with modern features and, at about 2-1/2 inches thick when folded, it’s the only current medium format camera that will slide into a jacket pocket.
From Russia with love: The last TLR standing
Lomography Lubitel 166+: Yes, you can still buy a brand new TLR if you opt for the long-running Russian-made Lubitel described by the Lomography folks as a ”re-creation of a Soviet-era classic.
” It’s name means “amateur” in Russian, which ought to tell you something, but this simple plastic-bodied TLR has a decent, glass 75mm f/4.5 triplet lens,
and an improved pop-up, waist-level viewfinder with a flat ground glass that shows a 100% viewing image. You can shoot 6 x 6 cm images on 120 film, or 4.5 x 6 cm images using the included drop-in format mask.
And, it comes with a 35mm Lubikin conversion kit so you can create fascinating “58 x 33mm vertical panoramas with exposed sprocket holes showing” on 35mm film.
The Lubitel provides apertures from f/4.5-f/22 and shutter speeds from 1/15 to 1/125 sec plus B. Minimum focusing distance is 2.6 feet and it has a standard X-sync hot shoe and 1/4″-20 tripod socket.
This modest camera is no Rollei, but it’s a lot of fun for the money.
Large Format View Cameras: The film/digital connection
Virtually all 4 x 5, 5 x 7, 8 x 10″ and 6 x 9cm view cameras have spring-loaded ground glass backs and most can accept standard film holders or third party digital capture modules.
You can check out the dozens of new view cameras available on the B&H website, but we’ll briefly mention 3 to give you a sense of what’s out there.
Toyo View 45CF Field Camera: Constructed of lightweight polycarbonate and carbon fiber, this 4 x 5″ view includes a reversible Graflok-type ground glass back with etched markings for 6 x 7 and 6 x 9cm formats, and accepts Toyo flat or recessed lens boards.
Cambo Ultima 4 x 5″ View: This top-of-the-line aluminum alloy field and studio 4 x 5″ view camera provides a comprehensive range of movements and features a 17.7-inch two-piece monorail,
geared yaw-free variable-axis tilt and swing movements, and dual-range focusing.
Linhof Technikardan 23S: Exquisitely made and finished, it provides studio camera features in a field size camera, a comprehensive range of adjustments via its L-shaped front and rear standards,
comes with a Linhof Quicklock 23 ground glass back, and folds flat for easy transport.
Instant-picture film cameras live!
Yes, instant film cameras are still available and here are two ones worth mentioning:
Polaroid 300 Instant Film Camera: This cute looking bug-eyed creature takes business card size prints on instax mini instant film, has a built-in flash, is powered by 4 AA batteries, and comes in four colors.
Fujifilm instax mini 90 Neo Classic: With vintage styling, this instant film camera uses instax mini film to produce credit card sized images, has a retractable 60mm lens that can focus to 11.8-inches in macro mode, six shooting modes,
built-in flash, a brightness control, and a tripod socket. It uses a rechargeable lithium-ion battery.
If you’re an instant picture fan determined to go back to the future with something more sophisticated, check out the refurbished Impossible Polaroid SX-70 and SX-70 Sonar folding SLRs that take 3.1 x 3.1-inch prints on SX-70 Type film.
Other classic Polaroid models are also available.
Simple lo-fi film cameras
These descendants of the simple box cameras of yore are popular with art photographers and nostalgia fans aiming to create an “old-timey” look and feel in their images.
What they capture may not be critically sharp but it sure can be cool. Here are two examples culled from the rafts of Holgas and Lomography Dianas listed on the B&H website:
Lomography Diana F+: It takes twelve 5.2 x 5.2cm or sixteen 4.2 x 4.2cm images per roll of 120 film, has as 75mm lens that’s removable for wide-angle pinhole shots, four focusing zones down to 1.6′,
shutter speeds of “sunny, cloudy, and B,” a simple optical viewfinder, and a standard tripod socket. Also check out the Lomography Diana Mini 35mm camera and the Lomography Konstruktor F 35mm Film SLR Camera Kit.
Holga 120CFN: This simple, fixed-focus toy camera has a single-element 60mm f/8 plastic lens, captures 6 x 6cm or 6 x 4.5cm images on 120 film via a sliding format selector, and has a built-in flash powered by two AA batteries.
It is said to yield images with a “dream-like vignette look” and has a color wheel in its built-in flash that lets you choose red, blue, yellow, standard white, or a combination.

For More On This Article Click Here
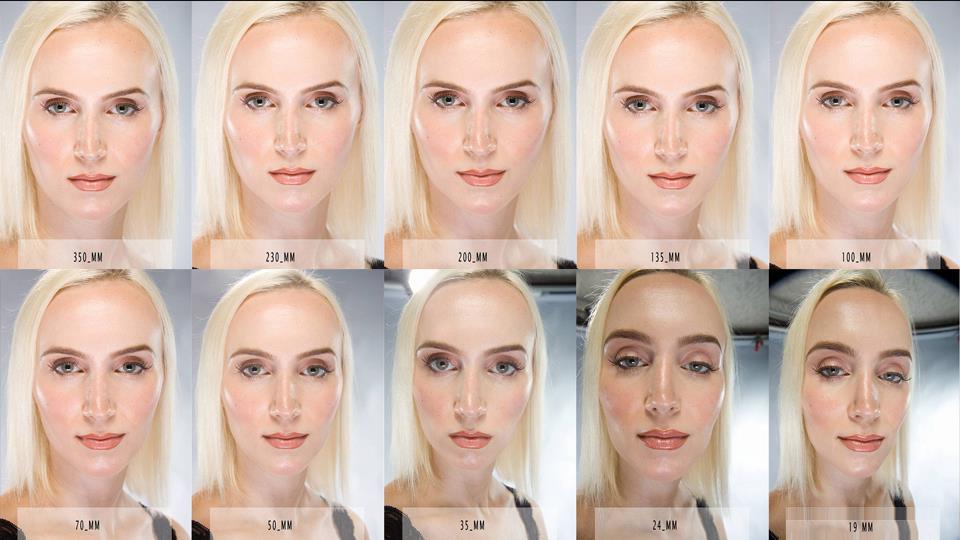
EVER WONDER WHY YOU MAY LOOK PRETTIER IN SOME PHOTOS AND UGLIER IN OTHERS!!!!
 Posted on January 20, 2015
 by admin
  0
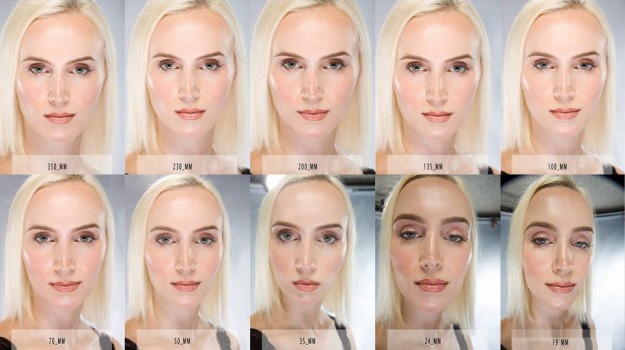
0 “Ever wonder why you may look prettier in some photos and uglier in others, even with the
same smile and the same lighting? It’s all about the camera lens.
These portraits—taken by Stephen Eastwood—show how this works.
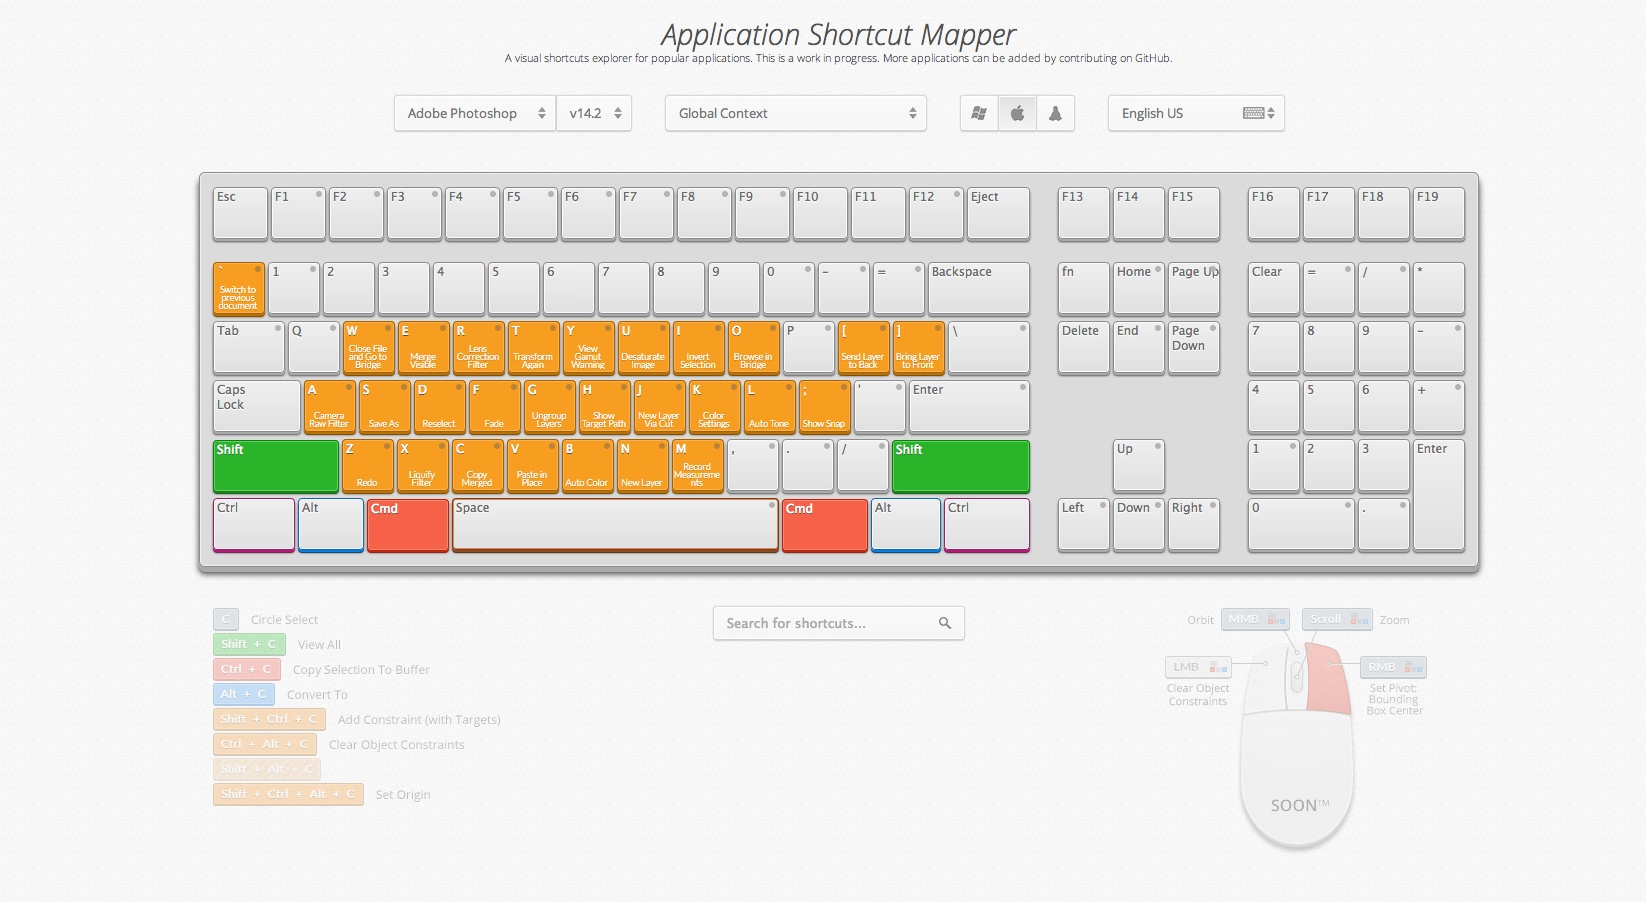
Many of us creatives who have been using computer programs like Photoshop and Cinema 4d know the value of keyboard shortcuts to save time and meet deadlines. Well you’re in luck a new team on the website github launched a prototype of a “Keyboard Shortcut Mapper” thats programmable for any application. To check it out Visit this Link
How to Send Money via PayPal
PayPal, a banking company owned by eBay, allows users to send money to another user from their PayPal account balance, another bank account, or a debit or credit card. Both parties must have a PayPal account to complete the transfer of funds. If the person you want to send money to does not have a PayPal account, she will receive an email or text message telling her to open an account to receive the money you sent.
-

Log in to your PayPal account and click on the “Send Payment” tab.
- Type in the email address or the mobile phone number of the person you want to send money to.
- Confirm that you have the email address or phone number correct before sending money so you don’t accidentally send it to the wrong person.

- Click on the field instead of typing the information if you have sent money to this person in the past. A scroll-down list will appear that shows everyone you have recently sent money to.

- Confirm that you have the email address or phone number correct before sending money so you don’t accidentally send it to the wrong person.
-

Enter the amount of money you want to send, then use the scroll-down list to select your payment’s currency. As of 2010, PayPal does business in over 150 countries and offers 16 currency choices.
-
Select the “Purchase” or “Personal” tab, depending on which describes the nature of your payment. Further classify your purchase by selecting among the following:
- Under the purchase tab, the options are “Goods,” “Services” or “eBay auction.”

- Personal categories include “Gift,” “Payment Owed,” “Cash Advance,” “Living Expenses” and “Other.”

- Under the purchase tab, the options are “Goods,” “Services” or “eBay auction.”
-

Click the “Continue” button and wait for the payment review page to load.
- Read through the payment information, making sure there are no errors in the payment amount and payee information.
- If the balance of your PayPal account is great enough to cover the payment, the money will automatically come out of your PayPal account.
-

If your PayPal account balance is less than the amount of your payment, PayPal will apply the balance towards the payment and take the remainder from whichever account you linked to your PayPal account to as a funding source.
- Click “Change” on the payment review page where PayPal lists your funding source if you wish to send the money from different source. The site will then direct you to choose the credit or debit card, or other linked account, where PayPal can withdraw money.
-

Click “Send Money” at the bottom of the payment review page after you are sure all the information is accurate.
Tips
- You can also choose to add funds to your PayPal account before you send money so the payment can come out of your PayPal balance. Click on the “Add Funds” tab on your account page to move money from a linked account to your PayPal account.
Warnings
- To send money from a source other than your PayPal balance, your PayPal account must be verified and all accounts that you want to be move money into and out of must be linked to your PayPal account. If you do banking with your other accounts online, you can usually link them to your PayPal account in minutes; otherwise, it takes several days to link accounts from brick-and-mortar banks.
- Using a debit or credit card to fund payments may subject you to fees from your bank.
- PayPal default settings will always draw money from your PayPal account balance as your primary funding source and your linked account as your secondary source. If you wish to send multiple payments using a different funding source, you need to change the source each time you send a payment.
Rafael Alexander Retouching Workshop
News
Upcoming Events
December 7, 2013 December 8, 2013- Workshop
“HIGH -END Commercial, Beauty & Fashion Retouching ” (Intermediate Level Course)
City: Atlanta (Midtown)
Dates: from December 7, 2013 December 8, 2013
Workshop “HIGH -END FASHION BEAUTY & Retouching “
Saturday December 7 and Sunday, December 8, 2013 .
TIME 10am to 4pm
Costs:
Early registration $ 375 USD (until November 14, 2013 )
Normal Registration payment $ 500 USD
Requirements:
During the workshop its imperative you bring you Computer with Adobe Photoshop & Adobe Lightroom installed
Recommended (but not needed): a digital tablet.
Side note: This is a intermediate class so having knowledge of Adobe Photoshop , management layers , adjustment layers and masks is vital .
What this Workshop Includes:
Continental breakfast at midmorning
Pen drive with files and information workshop
Printed Hand out information workshop
Benefits of Attending this Workshop:
To observe the professional workflow in detail; Not only the techniques but also the basis for their aesthetic decisions.
To learn the current none-destructive industry techniques for the treatment of textures and manipulating light.
To Better understand concepts and principles as Composition – Color – Light and Local Contrast and its application and Importance in image editing.
Objective:
The main objective of the workshop is to understand in depth the tools necessary to achieve a realistic finish-retouching people according to international standards in commercial fashion & beauty industry.
David Benoliel & Cristian Girotto created magic in the lab with there latest futuristic series for Zink
for those of you that keep asking me how was it done well here it is.
Apps Used: Adobe Photoshop
Apps Used: Cinema 4D
Estimated Completion Time: 3 Hours
Difficulty: Advanced
Apps Used: Adobe Photoshop
Apps Used: Cinema 4D
Estimated Completion Time: 3 Hours
Difficulty: Advanced
Final Product What You’ll Be Creating

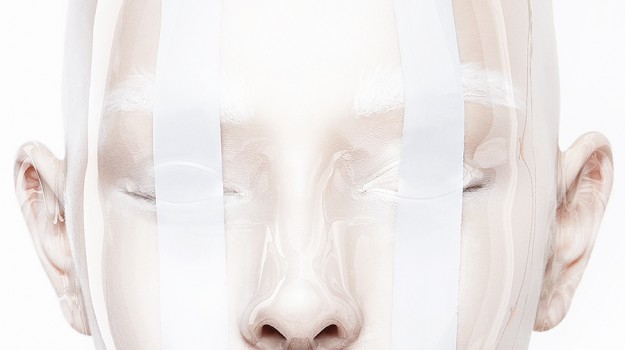
In this tutorial, we will show you how to quickly and easily create a beautiful, futuristic portrait by applying a
plastic wrap effect or mask to a portrait using Cinema 4D and Photoshop. Let’s get started!
Tutorial Assets
______________________________________________________________________________
The following assets were used during the production of this tutorial. Please download them before you begin.
Editor’s note: Special thanks to Martin Higgs, Stefka Pavlova, and Shonagh Louise
for allowing us the use of their photo in this tutorial. The high resolution image is available on Shutterstock
but the low resolution image can be downloaded below for use in this tutorial.
- Mask (High Resolution)
- Mask (Low Resolution)
- Photo Studio
______________________________________________
1. Creating 3D Human Head
Step 1
Open Cinema 4D. Open Content Browser (Window > Content Browser) and go to Presets > Humans.
Double click on Lisa to add it on the stage.

Step 2
Remove the unwanted body parts. Select all nested layers below the body layer and press Delete.

Step 3
Press Enable Axis Modification from the left toolbar and select the blue dot at the bottom (Anchor point). Move the Anchor point of the body from the bottom to the center of the head by dragging.

Step 4
Rotation check. Don’t forget to disable Axis Modification. Press Rotate tool (Top toolbar) and rotate the figure just to check the Anchor point position. After the check Undo (CMD/CTRL + Z) Rotation.

Step 5
Press Polygon mode from left toolbar and select Rectangle Selection from the top toolbar. UncheckOnly Select Visible Elements. Draw a rectangle from legs to the neck with Rectangle Selection tool and press Delete.


Step 6
Switch the camera view to Perspective by pressing the square icon on the top-right corner of the window.

Try to adjust the position of the head using Move, Scale and Rotate icons on the top-right corner of the window. The position of the head must match the pose and perspective of the photo.

2. Adding Materials
Step 1
Create new material for the head (Create > New Material) from Material Manager panel.

Step 2
From Material Editor check Color and set:
- Color to black.

Step 3
From Material Editor check Reflection and set:
- Color to white.
- Brightness to 10%
- Max Strength to 35%

Step 4
From Material Editor check Reflection and set:
- Texture to Fresnel

Step 5
Add the new material to Lisa layer with dragging it from material manager. Select default material and pressDelete to remove it.

Step 6
Add Sky object (from top toolbar)

Step 7
Creating sky material. Open Photo_Studio.jpg in Adobe Photoshop. Make one copy of the Background layer (Layer > Duplicate layer).

Extend the visible area using the Crop tool.

Move upper layer to the right using Move tool. Save the image as Photo_Studio2.jpg

Step 8
Go back to Cinema 4D. Create new material for the sky. From Material Editor check Luminance and loadPhoto_Studio2.jpg as a Texture.

Drag the new material to the Sky layer.

Step 9
Press Render view (Top toolbar) for quick preview.

3. Render Settings
Step 1
Press Render settings (Top toolbar) to set:
Output settings:
- Width: 2000px
- Height: 1500px (Use the same height as Mask.jpg)
- Lock Ratio: checked
- Resolution: 300 DPI
- Frame Range: Current Frame

Step 2
Save settings:
- Format: PNG
- Alpha Channel: checked

Step 3
Anti-Aliasing settings:
- Anti-Aliasing: Best
- Min Level: 1×1
- Max Level: 4×4

Step 4
Press Render > Render to Picture Viewer to save the rendered image.

4. Placing the Mask Over the Face
Step 1
Go to Adobe Photoshop and open Mask.jpg (File > Open). Use Crop tool to crop only the face.

Step 2
Open Mask.png (File > Open) and place it over the face.

Step 3
Select the layer with the rendered mask and set the Blend mode to Screen.

Step 4
Go to Edit > Transform > Wrap (CMD/CTRL + T) and try to adjust the mask over the face. Try to match the jaw line, eyes and outline.

Step 5
Go to Filter > Liquify.
Set from liquify settings:
- Show Backdrop: checked
- Use: Background
- Mode: In Front
- Opacity: 43%

Step 6
Correct the position of the eyes, nose and mouth using Medium Brush Size. Keep Low Brush Density and Brush pressure.

Step 7
Correct the neck outline to fit the shape.

Step 8
Create new Adjustment layer > Levels

Step 9
Push-up the lights by moving the sliders to the left side. Create clipping mask by clicking click to clip the layer icon.

Step 10
Select the clipping mask and press CMD/CTRL + I to invert it. Select Round Soft Brush and white foreground color.

Step 11
Start to paint over the mask to reveal the lights over the mouth, cheeks etc.

Step 12
Create new Adjustment layer > Hue/Saturation.
Set:
- Saturation: -100
and create clipping mask.

Step 13
Select Layer 1 and add Layer mask.

Step 14
Select the mask of Layer 1. Use Round Soft Brush with Opacity: 20% and start to paint with black to hide some unwanted parts from the rendered mask.

Step 15
Use Color Picker to take a sample from the image background color.

Step 16
Make one New layer and start painting over the visible anoying hair and eyelashes.

Step 17
And finaly remove the large reflections of the nose.

Congratulations! You’re Done.
In this tutorial we managed to create a beautiful, futuristic portrait using Photoshop and Cinema 4D. You can experiment with different lights, environments and material settings in Cinema 4D. Try to experiment with this technique and apply what you learned from this tutorial to your own ideas.

Source: http://psd.tutsplus.com/tutorials/photo-effects-tutorials/plastic-mask-effect/

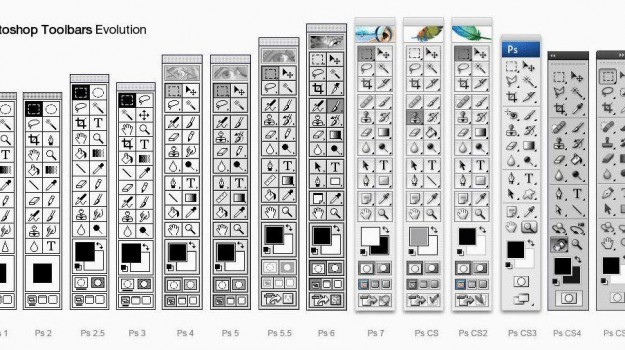
Adobe Photoshop has always been one of the greatest (if not the best) software when it comes to manipulating and editing images. It all started off in 1987 with a Mac application call Display, created by Thomas Knoll. With almost two decades worth of changes and improvements, you almost can’t imagine how the first version of Photoshop would look like by looking at the Photoshop you have on your desktop.
In this post, we attempt to bring you back in time to look at how the very first Photoshop look like, then we scan through each evolution of Photoshop to the latest Adobe Photoshop CS4 in market today.
Application Icon
| Adobe Photoshop .63 (1988) | |
| Adobe Photoshop .87 (1989) | |
| Adobe Photoshop 1.0 (1990) | |
| Adobe Photoshop 2.0 (1993) | |
| Adobe Photoshop 2.5 (1993) | |
| Adobe Photoshop 3.0 (1995) | |
| Adobe Photoshop 4.0 (1996) | |
| Adobe Photoshop 5.0 (1998) | |
| Adobe Photoshop 5.5 (1998) | |
| Adobe Photoshop 6.0 (2000) | |
| Adobe Photoshop 7.0 (2002) | |
| Creative Suite 1 (2003) | |
| Creative Suite 2 (2005) | |
| Creative Suite 3 (2007) | |
| Creative Suite 4 (2009) |
Welcome Splash / About Screen
Adobe Photoshop .07 (1988)

Adobe Photoshop .63 (1988)

Adobe Photoshop .87 (1989)

Adobe Photoshop 1.0 (1990)

Adobe Photoshop 2.0 (1993)

Adobe Photoshop 2.5 (1993)

Adobe Photoshop 3.0 (1995)

Adobe Photoshop 4.0 (1996)

Adobe Photoshop 5.0 (1998)

Adobe Photoshop 5.5 (1998)

Adobe Photoshop 6.0 (2000)

Adobe Photoshop 7.0 (2002)

Creative Suite 1 (2003)

Creative Suite 2 (2005)

Creative Suite 3 (2007)

Creative Suite 4 (2009)

Toolbars
Adobe Photoshop .63(1988) |
Adobe Photoshop .87(1989) |
Adobe Photoshop 1.0(1990) |
Adobe Photoshop 2.0(1993) |
Adobe Photoshop 2.5(1993) |
Adobe Photoshop 3.0(1995) |
Adobe Photoshop 4.0(1998) |
Adobe Photoshop 5.0(1998) |
Adobe Photoshop 5.5(1998) |
Adobe Photoshop 6.0(2000) |
Adobe Photoshop 7.0(2002) |
Creative Suite 1(2003) |
Creative Suite 2(2005) |
Creative Suite 3(2007) |
Creative Suite 4(2009) |
Workspace
Adobe Photoshop 0.63 (1988)

Adobe Photoshop 1.0 (1990)

Adobe Photoshop 2.5 (1993)

Adobe Photoshop 3.0 (1995)

Adobe Photoshop 4.0 (1996)

Adobe Photoshop 5.0 (1998)

Adobe Photoshop 5.5 (1998)

Adobe Photoshop 6.0 (2000)

Adobe Photoshop 7.0 (2002)

Creative Suite 1 (2003)

Creative Suite 2 (2005)

Creative Suite 3 (2007)

Creative Suite 4 (2009)

As I am Post Production Artist, I really love Photoshop keyboard shortcuts – it really helps to build up working speed using them in Your workflow. Keyboard shortcuts are keystrokes or keystroke combinations to quickly execute some command. If You like using Photoshop as designer, You will evaluate those keyboard shortcuts strength. However there are really huge amount of keyboard shortcuts in Photoshop,
This is handy overview of most useful keyboard shortcuts available in Adobe Photoshop.
And one more fun thing – imagine You go to new design agency – You can really retain great impression as great Photoshop master, if You use those shortcuts often enough in Your workflow. I just saw my boss face when he was watching how I work – I can say – feeling was really good! 🙂
Notes
I will be using ‘+’ – to define two or more keyboard combinations for example – CTRL + ALT + TAB etc.
I wrote this article using Windows, so if Your are using Macintosh – CONTROL = COMMAND

and ALT = OPTION
Global keyboard shortcuts
1.You can check all Your preferences pressing CTRL + K and learn more.
2. Press TAB – to show/hide tool panels;
3. Press SHIFT + TAB to show/hide only Your palette;
4. Press F repeatedly to cycle screen modes;
5. Press CTRL + TAB to switch to Your next document;
6. Press CTRL + SHIFT + TAB to switch to Your previous document;
7. Press CTRL + T to enter free transform mode;

Tip: You can scale proportionally from center Your transform by pressing and holding ALT + SHIFT, when You are dragging.
8. Press ALT + DELETE to fill the layer with foreground color or SHIFT + DELETE to fill with background color;
Tip: You can use ALT + BACKSPACE or SHIFT + BACKSPACE to fill non-transparent pixels.
9. Press X to switch foreground/background color;
10. Press D to reset foreground/background color to black/white;

Tip: You can use ALT + DELETE shortcut to fill just current selection.
11. If You work in high zoom pressing and holding SPACEBAR comes very handy by giving You hand tool to move small distance.
Also You can use it greatly with the marquee tool (or rectangle, shape tool etc.) – just start dragging on the document, and press SPACEBAR while holding Your mouse and move it to desired place, resize as You want it and repeat circle until You are pleased;

12. When You are working, there are lot of experimenting going on, so very handy becomes undo/redo shortcuts :
Press CTRL + Z to undo/redo previous activity;
Press CTRL + ALT + Z to undo multiple times;
13. While working with big files, it is very important to save often (every 5-10 min) – press CTRL + S to save Your document;
14. I always use this one – press CTRL + ALT + SHIFT + S to bring up ‘save for web & devices ‘ dialog;
15. If You often use filters remember this keyboard shortcut, to repeat previous accomplished filter : CTRL + F

16. To draw precise, symmetrical circle or square or straight line press and hold SHIFT, while drawing it.

17. To temporarily switch to move tool while using another press CTRL + CLICK + hold you mouse
18. Open FILL dialogue by pressing SHIFT + BACKSPACE

19. You can test Your fonts easily by selecting Your text, then selecting “set font family” form and just pressingUP or DOWN buttons.

20. A always hated that I just can’t simply apply my text by pressing ENTER button..that was until I heard about some great keyboard shortcut!
So how to approve and escape text editing mode? – easy. Just press Your numeric ENTER or CTRL + ENTER
21. Increase/decrease brush size pressing [ or ] – (left bracket or right bracket)
Toolbar
22. Use Your toolbar shortcuts to switch between tools faster!
Memorize shortcuts of tools You use the most.

You can easily see keyboard shortcut by mouseover on certain tool :

Use Your Zoom
tool wisely!
23. Double click on zoom tool to zoom Your document 100% size;
Tip: You can press CTRL + ALT + 0 to get actual pixels too (100 % size)!
24. Use keyboard shortcuts to zoom in/zoom out Your document:
Zoom in – CTRL + +
Zoom out – CTRL + –

or
use Your mouse scroll wheel to zoom in/zoom out – ALT + SCROLL WHEEL UP/ALT + SCROLL WHEEL DOWN
25. To temporarily switch to zoom
tool, while using another press:
Quick zoom in: CTRL + SPACE + CLICK
Quick zoom out: ALT + SPACE + CLICK
26. Use keyboard shortcuts CTRL + 0 to set Your image fit to window;
27. Press CTRL + W to close just Your current open document;
Palette
Note : check out Your palette keyboard shortcuts pressing ALT + W
28. Layers menu
Note: press F7 to show/hide Your layers menu.
29. Press CTRL + SHIFT + N to create new layer with dialog box;
30. Press CTRL + SHIFT + ALT + N to create new layer without opening dialog box;
31. Press CTRL + ALT + J to duplicate active layer with dialog box;
32. Press CTRL + J to duplicate active layer without opening dialog box ;
33. How to navigate between layers:
Mouse click on active layer and press SHIFT to select several layers:

Press and hold CONTROL to select or deselect definite layers;
34.Press CTRL+G to group selected layers in one group:
Tip: use CTRL + SHIFT + G to ungroup layers

35. Collapse or expand all groups in Your layers palette by pressing CTRL + CLICK on the group’s triangle:


36. Show/ hide Your layers by and holding Your mouse and dragging it up/down. Repeat to do inverse action:

37. To mask layers, do this trick – hold ALT + MOUSEOVER on the line between layers:

38. Click and drag background layer to make duplicate. I suggest to use this action starting every new file:

39. Press ALT + CLICK on
icon – to show/hide all layers, except active one:

40. Press CAPSLOCK to show cursor precise/standard mode;
41. Press CTRL + CLICK on layer

to make selection:

42. Press CTRL + I to inverse current selection;
43. Press CTRL + D to deselect current selection;
44. You maybe knew about deselect shortcut, but did You know how to reselect previous selection? Just press CTRL + SHIFT + D !
45. Press CTRL + E to merge selected layers or press CTRL + SHIFT + E to merge all visible layers into one;
46. If You ever wanted to make Your text longer or little bit shorter with tracking, You can do it easy with keyboard shortcuts – so first select Your text and then press CTRL + ALT + > or CTRL + ALT + < to set wider or thinner indent.
47. You can easily change Your layer or brush opacity

by just pressing number keys – 1 = 10%, 2 = 20%, 3 = 30% etc.

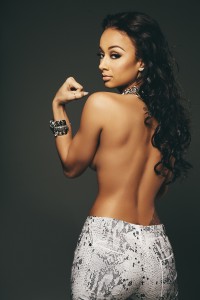

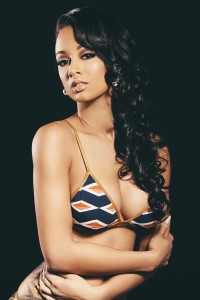
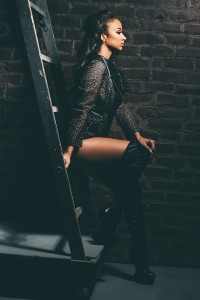
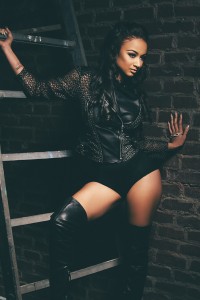
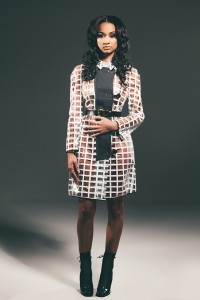
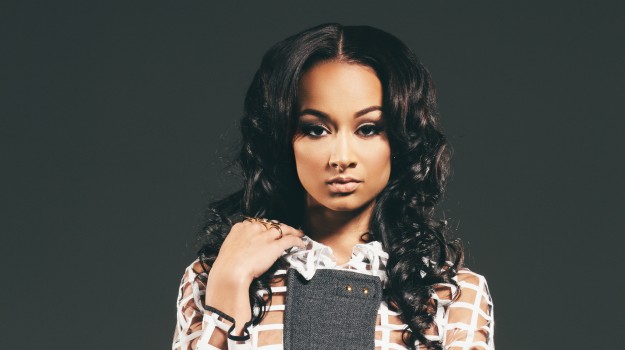
“Basketball Wives L.A” reality star Draya Michele, stands to deliver an extraordinary debut cover shoot for Rolling Out Magazine.
Personally, I was stoked, as I am an actual fan of the show, and even bigger fan of Michele herself. When these image burst thru the viral pipeline, I felt honored that I was chosen to carry out the vision for the magazine, and believe fans and critics alike will be further captivated by the sexual energy of Draya Michele in her first cover shoot.
Once the photographer sent over plans for the treatment and the tones were approved I went to work on the retouch. The intriguing beauty of Ms. Michele couldn’t have made my job easier. Her skin was flawless from the beginning, and most of my time was spent toning and carving.
I recommend watching Rollingout’s exclusive behind the scenes interview footage with the glamorus reality favorite as she reveals her start in the entertainment industry.

