Uncategorized
Elle Indonesia Behind The Scenes Look At The Editorial In The Making
 Posted on September 8, 2016
 by admin
  0
0 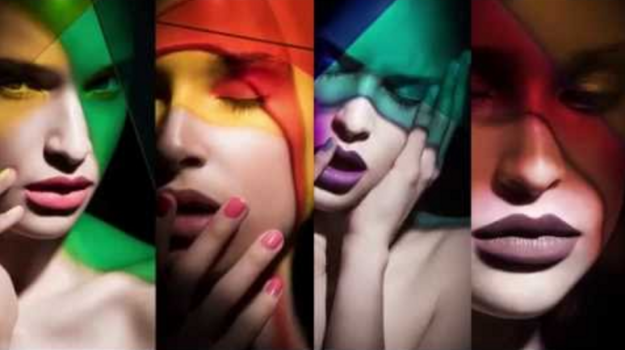
I had fun working on this series. Working with Lindsay is always awsome she gives me complete freedom.
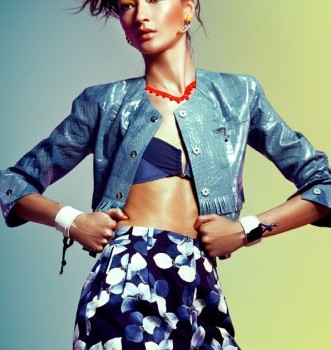
Lindsay A. “I’ve been wanting to shoot an editorial with gels projected on the face for quite some time now! I teamed up with the incredibly talented Griselle Rosario to do hair and makeup for this Elle Indonesia editorial.
For this shoot we bought Rosco gels and misc transparent plastics to hold between the subject and the light to cast the rich colors on the face. We actually used the gels as part of the composition in the frame to create lines upon lines to enhance the interest and composition. I used a single strobe with high contrast modifier (zoom reflector) and or grid to cast the color onto the face.
I had so much fun layering colors, lines and shooting with the Canon 5Ds for intense detail in these macro beauty shots.
On this bold and dramatic gel shoot stylist LSC for 4Seasons Style Management provided accessories and Angel Williams was our manicurist. I photographed beautiful Cece from Wilhelmina as my gel muse!
View the finished images here: http://learn.lindsayadlerphotography….

Rafael Alexander Retouching Workshop
News
Upcoming Events
December 7, 2013 December 8, 2013- Workshop
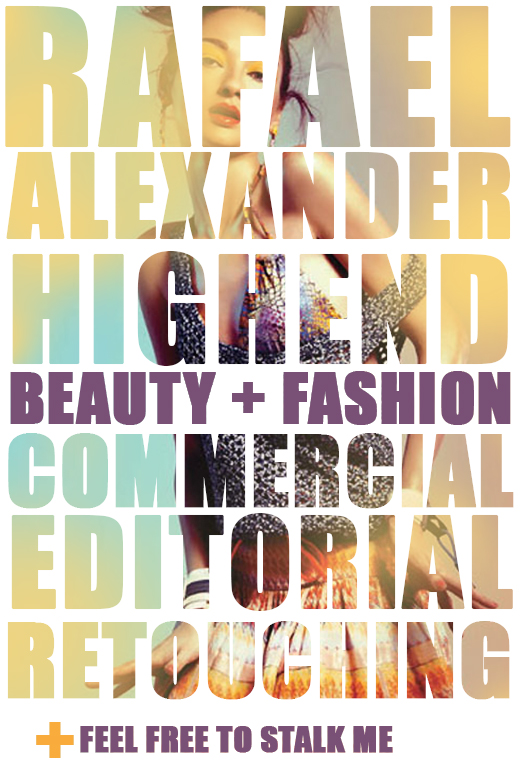
“HIGH -END Commercial, Beauty & Fashion Retouching ” (Intermediate Level Course)
City: Atlanta (Midtown)
Dates: from December 7, 2013 December 8, 2013
Workshop “HIGH -END FASHION BEAUTY & Retouching “
Saturday December 7 and Sunday, December 8, 2013 .
TIME 10am to 4pm
Costs:
Early registration $ 375 USD (until November 14, 2013 )
Normal Registration payment $ 500 USD
Requirements:
During the workshop its imperative you bring you Computer with Adobe Photoshop & Adobe Lightroom installed
Recommended (but not needed): a digital tablet.
Side note: This is a intermediate class so having knowledge of Adobe Photoshop , management layers , adjustment layers and masks is vital .
What this Workshop Includes:
Continental breakfast at midmorning
Pen drive with files and information workshop
Printed Hand out information workshop
Benefits of Attending this Workshop:
To observe the professional workflow in detail; Not only the techniques but also the basis for their aesthetic decisions.
To learn the current none-destructive industry techniques for the treatment of textures and manipulating light.
To Better understand concepts and principles as Composition – Color – Light and Local Contrast and its application and Importance in image editing.
Objective:
The main objective of the workshop is to understand in depth the tools necessary to achieve a realistic finish-retouching people according to international standards in commercial fashion & beauty industry.
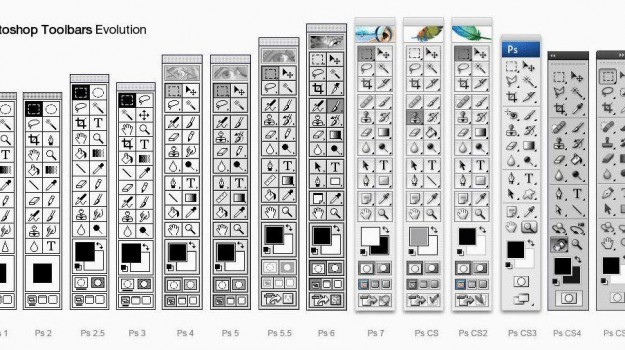

Adobe Photoshop has always been one of the greatest (if not the best) software when it comes to manipulating and editing images. It all started off in 1987 with a Mac application call Display, created by Thomas Knoll. With almost two decades worth of changes and improvements, you almost can’t imagine how the first version of Photoshop would look like by looking at the Photoshop you have on your desktop.
In this post, we attempt to bring you back in time to look at how the very first Photoshop look like, then we scan through each evolution of Photoshop to the latest Adobe Photoshop CS4 in market today.
Application Icon
| Adobe Photoshop .63 (1988) | |
| Adobe Photoshop .87 (1989) | |
| Adobe Photoshop 1.0 (1990) | |
| Adobe Photoshop 2.0 (1993) | |
| Adobe Photoshop 2.5 (1993) | |
| Adobe Photoshop 3.0 (1995) | |
| Adobe Photoshop 4.0 (1996) | |
| Adobe Photoshop 5.0 (1998) | |
| Adobe Photoshop 5.5 (1998) | |
| Adobe Photoshop 6.0 (2000) | |
| Adobe Photoshop 7.0 (2002) | |
| Creative Suite 1 (2003) | |
| Creative Suite 2 (2005) | |
| Creative Suite 3 (2007) | |
| Creative Suite 4 (2009) |
Welcome Splash / About Screen
Adobe Photoshop .07 (1988)

Adobe Photoshop .63 (1988)

Adobe Photoshop .87 (1989)

Adobe Photoshop 1.0 (1990)

Adobe Photoshop 2.0 (1993)

Adobe Photoshop 2.5 (1993)

Adobe Photoshop 3.0 (1995)

Adobe Photoshop 4.0 (1996)

Adobe Photoshop 5.0 (1998)

Adobe Photoshop 5.5 (1998)

Adobe Photoshop 6.0 (2000)

Adobe Photoshop 7.0 (2002)

Creative Suite 1 (2003)

Creative Suite 2 (2005)

Creative Suite 3 (2007)

Creative Suite 4 (2009)

Toolbars
Adobe Photoshop .63(1988) |
Adobe Photoshop .87(1989) |
Adobe Photoshop 1.0(1990) |
Adobe Photoshop 2.0(1993) |
Adobe Photoshop 2.5(1993) |
Adobe Photoshop 3.0(1995) |
Adobe Photoshop 4.0(1998) |
Adobe Photoshop 5.0(1998) |
Adobe Photoshop 5.5(1998) |
Adobe Photoshop 6.0(2000) |
Adobe Photoshop 7.0(2002) |
Creative Suite 1(2003) |
Creative Suite 2(2005) |
Creative Suite 3(2007) |
Creative Suite 4(2009) |
Workspace
Adobe Photoshop 0.63 (1988)

Adobe Photoshop 1.0 (1990)

Adobe Photoshop 2.5 (1993)

Adobe Photoshop 3.0 (1995)

Adobe Photoshop 4.0 (1996)

Adobe Photoshop 5.0 (1998)

Adobe Photoshop 5.5 (1998)

Adobe Photoshop 6.0 (2000)

Adobe Photoshop 7.0 (2002)

Creative Suite 1 (2003)

Creative Suite 2 (2005)

Creative Suite 3 (2007)

Creative Suite 4 (2009)


As I am Post Production Artist, I really love Photoshop keyboard shortcuts – it really helps to build up working speed using them in Your workflow. Keyboard shortcuts are keystrokes or keystroke combinations to quickly execute some command. If You like using Photoshop as designer, You will evaluate those keyboard shortcuts strength. However there are really huge amount of keyboard shortcuts in Photoshop,
This is handy overview of most useful keyboard shortcuts available in Adobe Photoshop.
And one more fun thing – imagine You go to new design agency – You can really retain great impression as great Photoshop master, if You use those shortcuts often enough in Your workflow. I just saw my boss face when he was watching how I work – I can say – feeling was really good! 🙂
Notes
I will be using ‘+’ – to define two or more keyboard combinations for example – CTRL + ALT + TAB etc.
I wrote this article using Windows, so if Your are using Macintosh – CONTROL = COMMAND

and ALT = OPTION
Global keyboard shortcuts
1.You can check all Your preferences pressing CTRL + K and learn more.
2. Press TAB – to show/hide tool panels;
3. Press SHIFT + TAB to show/hide only Your palette;
4. Press F repeatedly to cycle screen modes;
5. Press CTRL + TAB to switch to Your next document;
6. Press CTRL + SHIFT + TAB to switch to Your previous document;
7. Press CTRL + T to enter free transform mode;

Tip: You can scale proportionally from center Your transform by pressing and holding ALT + SHIFT, when You are dragging.
8. Press ALT + DELETE to fill the layer with foreground color or SHIFT + DELETE to fill with background color;
Tip: You can use ALT + BACKSPACE or SHIFT + BACKSPACE to fill non-transparent pixels.
9. Press X to switch foreground/background color;
10. Press D to reset foreground/background color to black/white;

Tip: You can use ALT + DELETE shortcut to fill just current selection.
11. If You work in high zoom pressing and holding SPACEBAR comes very handy by giving You hand tool to move small distance.
Also You can use it greatly with the marquee tool (or rectangle, shape tool etc.) – just start dragging on the document, and press SPACEBAR while holding Your mouse and move it to desired place, resize as You want it and repeat circle until You are pleased;

12. When You are working, there are lot of experimenting going on, so very handy becomes undo/redo shortcuts :
Press CTRL + Z to undo/redo previous activity;
Press CTRL + ALT + Z to undo multiple times;
13. While working with big files, it is very important to save often (every 5-10 min) – press CTRL + S to save Your document;
14. I always use this one – press CTRL + ALT + SHIFT + S to bring up ‘save for web & devices ‘ dialog;
15. If You often use filters remember this keyboard shortcut, to repeat previous accomplished filter : CTRL + F

16. To draw precise, symmetrical circle or square or straight line press and hold SHIFT, while drawing it.

17. To temporarily switch to move tool while using another press CTRL + CLICK + hold you mouse
18. Open FILL dialogue by pressing SHIFT + BACKSPACE

19. You can test Your fonts easily by selecting Your text, then selecting “set font family” form and just pressingUP or DOWN buttons.

20. A always hated that I just can’t simply apply my text by pressing ENTER button..that was until I heard about some great keyboard shortcut!
So how to approve and escape text editing mode? – easy. Just press Your numeric ENTER or CTRL + ENTER
21. Increase/decrease brush size pressing [ or ] – (left bracket or right bracket)
Toolbar
22. Use Your toolbar shortcuts to switch between tools faster!
Memorize shortcuts of tools You use the most.

You can easily see keyboard shortcut by mouseover on certain tool :

Use Your Zoom
tool wisely!
23. Double click on zoom tool to zoom Your document 100% size;
Tip: You can press CTRL + ALT + 0 to get actual pixels too (100 % size)!
24. Use keyboard shortcuts to zoom in/zoom out Your document:
Zoom in – CTRL + +
Zoom out – CTRL + –

or
use Your mouse scroll wheel to zoom in/zoom out – ALT + SCROLL WHEEL UP/ALT + SCROLL WHEEL DOWN
25. To temporarily switch to zoom
tool, while using another press:
Quick zoom in: CTRL + SPACE + CLICK
Quick zoom out: ALT + SPACE + CLICK
26. Use keyboard shortcuts CTRL + 0 to set Your image fit to window;
27. Press CTRL + W to close just Your current open document;
Palette
Note : check out Your palette keyboard shortcuts pressing ALT + W
28. Layers menu
Note: press F7 to show/hide Your layers menu.
29. Press CTRL + SHIFT + N to create new layer with dialog box;
30. Press CTRL + SHIFT + ALT + N to create new layer without opening dialog box;
31. Press CTRL + ALT + J to duplicate active layer with dialog box;
32. Press CTRL + J to duplicate active layer without opening dialog box ;
33. How to navigate between layers:
Mouse click on active layer and press SHIFT to select several layers:

Press and hold CONTROL to select or deselect definite layers;
34.Press CTRL+G to group selected layers in one group:
Tip: use CTRL + SHIFT + G to ungroup layers

35. Collapse or expand all groups in Your layers palette by pressing CTRL + CLICK on the group’s triangle:


36. Show/ hide Your layers by and holding Your mouse and dragging it up/down. Repeat to do inverse action:

37. To mask layers, do this trick – hold ALT + MOUSEOVER on the line between layers:

38. Click and drag background layer to make duplicate. I suggest to use this action starting every new file:

39. Press ALT + CLICK on
icon – to show/hide all layers, except active one:

40. Press CAPSLOCK to show cursor precise/standard mode;
41. Press CTRL + CLICK on layer

to make selection:

42. Press CTRL + I to inverse current selection;
43. Press CTRL + D to deselect current selection;
44. You maybe knew about deselect shortcut, but did You know how to reselect previous selection? Just press CTRL + SHIFT + D !
45. Press CTRL + E to merge selected layers or press CTRL + SHIFT + E to merge all visible layers into one;
46. If You ever wanted to make Your text longer or little bit shorter with tracking, You can do it easy with keyboard shortcuts – so first select Your text and then press CTRL + ALT + > or CTRL + ALT + < to set wider or thinner indent.
47. You can easily change Your layer or brush opacity

by just pressing number keys – 1 = 10%, 2 = 20%, 3 = 30% etc.


“Basketball Wives L.A” reality star Draya Michele, stands to deliver an extraordinary debut cover shoot for Rolling Out Magazine.
Personally, I was stoked, as I am an actual fan of the show, and even bigger fan of Michele herself. When these image burst thru the viral pipeline, I felt honored that I was chosen to carry out the vision for the magazine, and believe fans and critics alike will be further captivated by the sexual energy of Draya Michele in her first cover shoot.
Once the photographer sent over plans for the treatment and the tones were approved I went to work on the retouch. The intriguing beauty of Ms. Michele couldn’t have made my job easier. Her skin was flawless from the beginning, and most of my time was spent toning and carving.
I recommend watching Rollingout’s exclusive behind the scenes interview footage with the glamorus reality favorite as she reveals her start in the entertainment industry.
Processing the Final Image After You Capture It…
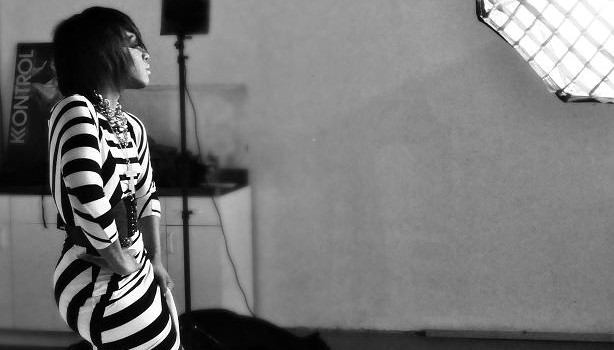
A few months back I had the opportunity to retouch the R&B singer Dawn Richard, who was gearing up for the next Annual Sexy Body Issue for Kontrol Magazine. For those of you who don’t know, her voice is nothing short of amazing. The images were great right out the camera. Dawn has this uncanny ability to channel her inner seductress. Normally when given an assignment there are boundaries I must stay within. I can then retouch the image within those parameters. In most cases with editorial stories they are either interpreted through lighting, the set, or wardrobe etc.

The latter can be ruled out for this shoot for this story since the set was just a roll of 6×9 grey background paper. So, the lighting was imperative for the story to evoke the feel of “sexy”. After an additional phone conversation with the photographer, I gathered a general sense of the mood we were going for, and I then began to process his vision. It’s at this time you pay close attention to the art director or photographer etc. word choice that is used to describe the mood they’re attempting to capture. For example, if the words chosen were “clean with sort of a 70’s undertone,” it may help to do a quick Google search, and make a mental note of the things you see. This often times helps with deciding color tone and direction of the type of finish you want to use on an image. After the initial conversation from the photographer and art director the word “strong” seemed to be the general undertone of the discussion. So, I based my retouch around this specific theme. To induce this feeling of strong; clean lines, deep jawbone and heavy contrast was a must.

General skin and hair clean up is vital to any retouch. Just be sure to keep contours intact. With celebrity retouching, rule one is never change any features birthmarks, moles, or notable scars, unless asked otherwise. As a celebrity this is how the general public recognizes them on the daily. Dawn’s collarbone is one of her most alluring features; so, changing the intensity of light with the dodge tool was key with this type of lighting set up. The finishing tweaks applied were just really pushing the balance of light and dark to make the image contrast right before it reaches the point of looking crisp.
There’s a new “King” on the block in the world of web-based photo editing “Pixlr” It is being developed as part of Autodesk Research in the area of visualization. But don’t take my word for it check it out for your self


issue 8, “The Innovation Issue” hitting the shelves few days ago, I thought I’d share a sneaky preview to tantalise your PHOENIX buds and get your finger tips tingling in anticipation of flicking through our brand new glossy pages.
London very own Photography Catherine Harbour got behind the lens to shoot extraordinary beauty series with model Emma Menteath, Post Production done by me.
Photography : Catherine Harbour
Make up: Lan Nguyen using MAC
Styling: Rebecca Roy
Model: Emma Menteath
Post Production: Rafael Alexander

Elle Vietnam June 2012
Brazilian beauty Bruna Tenório covers the June ‘Green’ issue of Elle Vietnam, lensed by Kevin Sinclair and retouched by yours truly